Recent Posts
Winter Storm Damage Restoration for Your Home in Central East Baton Rouge Parish
1/14/2025 (Permalink)
Winter storms can bring unexpected challenges to your home, such as frozen pipes, roof leaks, and water damage. SERVPRO of Central East Baton Rouge Parish is here to provide professional winter storm damage restoration services tailored to residential properties. Our experienced team responds quickly to assess the damage, remove excess water, and repair affected areas. We use advanced equipment and proven techniques to restore your home to its original condition efficiently.
Available 24/7, our goal is to minimize stress and disruption during this difficult time. Whether it’s water removal or addressing structural damage, you can count on us for prompt and reliable service. Protect your home this winter—trust SERVPRO of Central East Baton Rouge Parish for all your restoration needs!
Contact: (225) 275-7445
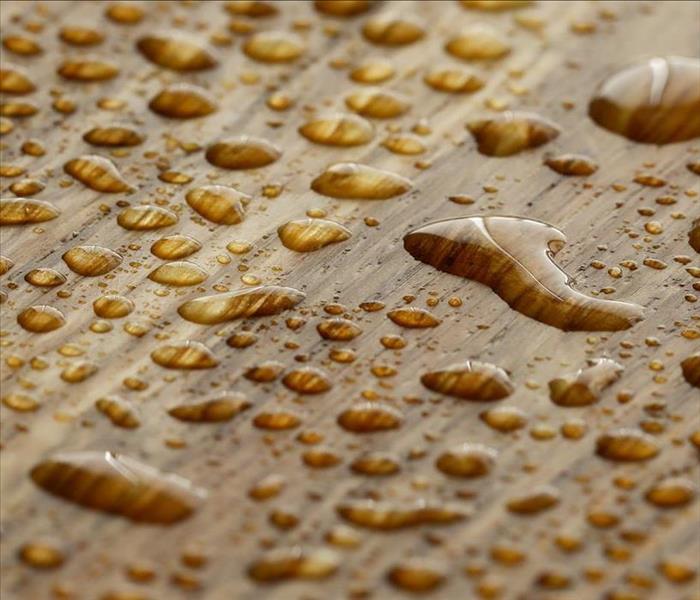
Understanding Water Damage and Its Cleaning Process in Central East Baton Rouge Parish
10/30/2024 (Permalink)
Water damage can disrupt homes and businesses, causing issues from structural harm to mold growth. At SERVPRO of Central East Baton Rouge Parish, we understand that quick action is critical to minimize damage and restore your space efficiently.
Water damage can result from floods, leaks, or plumbing failures, seeping into walls, floors, and furniture. Left untreated, moisture can lead to mold, compromising indoor air quality and posing health risks. That’s why our team is equipped with advanced tools and techniques to locate and eliminate hidden moisture.
Our water damage restoration process includes water extraction, drying, dehumidifying, and sanitizing to prevent long-term damage. With a focus on thorough cleaning and restoration, SERVPRO of Central East Baton Rouge Parish ensures your property is returned to its pre-damage condition.
For reliable water damage restoration in Baton Rouge Parish, trust our team to protect your property and restore peace of mind.
Contact: (225) 275-7445
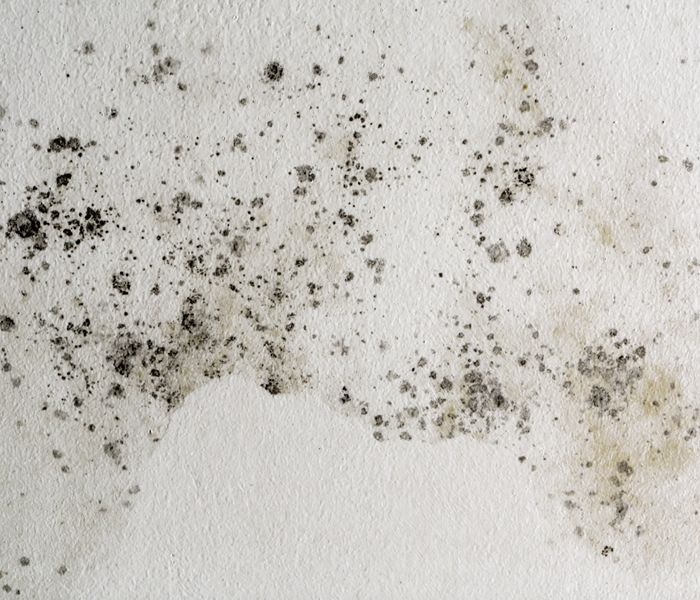
Understanding Mold Damage and Professional Cleaning in Central East Baton Rouge Parish
10/30/2024 (Permalink)
Mold damage can quickly escalate into a serious problem, affecting indoor air quality and posing health risks to occupants. In humid environments like Central East Baton Rouge Parish, mold can grow rapidly after water exposure, whether from flooding, leaks, or high humidity.
At SERVPRO of Central East Baton Rouge Parish, we specialize in thorough mold damage cleaning to protect your home or business. Our process begins with an inspection to identify mold sources, followed by containment to prevent the spread of mold spores. Using advanced techniques, we clean and treat affected areas to eliminate mold and prevent regrowth.
Mold is persistent, and DIY methods can often fail to fully eradicate it, allowing it to return. Our professional mold remediation team uses industry-grade equipment to restore healthy conditions safely and efficiently.
For reliable mold damage cleaning in Central East Baton Rouge Parish, trust to bring your property back to a safe, mold-free state. Protect your space with our expert services.
Contact: (225) 275-7445
Preventing Water Damage in Your Baton Rouge Home: Essential Tips
7/26/2024 (Permalink)
When it comes to safeguarding your home against water damage, prevention is key. Baton Rouge's humid climate and heavy rains make it essential to take proactive steps to protect your property. Here are some vital tips:
- Maintain Your Gutters: Ensure gutters and downspouts are clean and direct water away from your home.
- Inspect Your Roof: Regularly check for damaged or missing shingles.
- Seal Windows and Doors: Make sure all seals are intact to prevent water seepage.
- Install a Sump Pump: A sump pump can help keep your basement dry during heavy rains.
By following these steps, you can significantly reduce the risk of water damage to your home. For professional water damage restoration, contact SERVPRO of Central East Baton Rouge Parish.
Weathering the Storm: Tips for Minimizing Water Damage During Severe Storms
1/9/2024 (Permalink)
Severe storms, with their torrential rains and relentless winds, pose a significant threat to homes and properties. One of the most common and potentially devastating outcomes of such storms is water damage. However, with proactive measures and strategic planning, you can minimize the risk of water damage and protect your home. In this blog, we'll explore valuable tips for safeguarding your property during severe storms and reducing the impact of water-related issues.
Maintain Gutters and Downspouts
Ensure that gutters and downspouts are clear of debris, leaves, and other obstructions. Regularly clean and inspect these components to facilitate proper water drainage away from your home. Consider adding gutter extensions to direct water even farther away from your home's foundation. This simple addition can prevent water from pooling near the base of your house during heavy rainfall.
Inspect and Repair Roof and Doors
Regularly inspect your roof for damaged or missing shingles. Address any issues promptly to prevent water from infiltrating your home during a storm. A well-maintained roof is a crucial defense against water damage. Ensure that windows and doors are properly sealed to prevent water intrusion. Weatherstripping and caulking are effective ways to reinforce these vulnerable areas and keep water at bay.
HVAC Equipment & Sump Pump
If possible, elevate outdoor HVAC equipment to a level that prevents flooding during storms. This not only protects the equipment but also minimizes the risk of water entering your home through ventilation systems. Consider installing a sump pump in your basement or crawl space. Sump pumps are effective in preventing water accumulation and can be a valuable asset during severe storms.
Grade Your Yard Away from the Foundation
Ensure that the slope of your yard directs water away from the foundation. Proper grading helps prevent water from pooling near the base of your home, reducing the risk of foundation leaks and water damage. Strategic landscaping can help manage water flow. Planting native vegetation and creating swales or berms can absorb excess water and prevent runoff toward your home.
Inspect and Repair Foundation Cracks
Regularly inspect your home's foundation for cracks and promptly address any issues. Sealing foundation cracks is crucial in preventing water from seeping into your home during storms. In flood-prone areas, store valuable items and important documents at higher levels within your home. This precaution can protect your possessions from potential water damage.
Install Flood Sensors
Invest in flood sensors that can detect water in vulnerable areas of your home. These devices can provide early warnings, allowing you to take swift action and minimize potential damage.
Create an Emergency Plan
Develop a comprehensive emergency plan that includes evacuation routes, emergency contacts, and procedures for turning off utilities. Being prepared for severe storms empowers you to act swiftly and protect your home.
Minimizing water damage during severe storms requires a combination of proactive measures and strategic planning. By fortifying your home's defenses and implementing these tips, you can build resilience against the forces of nature. Remember that preparedness is key, and taking action before a storm arrives ensures that you can weather the storm with confidence and protect your home and loved ones from the potential ravages of water damage.
The Importance of Proper Ventilation During Fire Restoration
12/18/2023 (Permalink)
During the restoration process, whether it's due to water damage, fire damage, or mold growth, proper ventilation plays a crucial role. Ventilation is not only about creating a comfortable environment; it is essential for the health and safety of both the occupants and the restoration workers. In this blog, we will explore the importance of proper ventilation during restoration and its key benefits.
Removal of Odors and Airborne Contaminants
Restoration projects often involve the use of chemicals, cleaning agents, and paint, which can release strong odors and airborne contaminants. Proper ventilation helps to remove these odors and contaminants, improving the air quality in the affected area. It ensures a healthier and safer environment for everyone involved.
Prevention of Mold Growth
Mold thrives in damp and humid environments, making it a common concern during restoration projects. Proper ventilation plays a crucial role in controlling moisture levels and preventing mold growth. By increasing airflow and reducing humidity, it helps to dry out the affected area, preventing mold spores from spreading and potentially causing health issues.
Drying Out Materials and Speeding Up Restoration
Whether it's water damage restoration or drying out after extinguishing a fire, proper ventilation is vital for drying out materials effectively. It aids in the evaporation of moisture, reducing the risk of further damage and allowing for faster restoration. By facilitating the drying process, ventilation can help minimize overall downtime and inconvenience.
Removal of Harmful Gas
Restoration projects may involve the removal of hazardous materials, such as asbestos or lead-based paint. Proper ventilation helps to remove harmful gas and particles generated during removal or abatement processes. It protects both the occupants and restoration workers from exposure to these hazardous substances.
Control of Indoor Temperature and Humidity
Proper ventilation helps to regulate indoor temperature and humidity levels, creating a more comfortable environment for both the occupants and the restoration crew. It prevents excessive heat or moisture buildup, which can lead to discomfort and health issues. Maintaining a comfortable environment also enhances productivity and focus during the restoration process.
Protecting the Structural Integrity
Ventilation aids in the drying of structural components, such as walls, floors, and ceilings, preventing moisture-related issues that can compromise their integrity. Moisture trapped within these materials can lead to warping, rotting, or weakening of the structure, potentially requiring costly repairs in the future. Proper ventilation helps to preserve the structural integrity of the building.
Compliance with Safety Standards
Proper ventilation is not only important for health and comfort but also for meeting safety regulations and standards. Many jurisdictions have specific regulations regarding ventilation requirements in restoration projects, especially those involving hazardous materials. By ensuring proper ventilation, you can ensure compliance with these regulations and avoid potential legal consequences.
In conclusion, proper ventilation is crucial during the restoration process for several key reasons. It aids in the removal of odors and airborne contaminants, prevents mold growth, speeds up drying and restoration, removes harmful gas, controls indoor temperature and humidity, protects structural integrity, and ensures compliance with safety standards. By prioritizing proper ventilation, you can create a healthier, safer, and more efficient restoration environment for all involved.
Top 4 Hidden Places Where Mold Can Be Found
10/31/2023 (Permalink)
 Be proactive. Be aware of where mold could potentially grow.
Mold growth can be a concerning issue in our homes, and it often lurks in hidden places that go unnoticed. In this blog, we will explore the top four hidden places where mold can be found. By identifying these areas, you can take proactive steps to prevent mold growth and maintain a healthy living environment.
Behind Wallpaper and Wall Coverings
Behind wallpaper or wall coverings can be a prime location for mold to thrive. Moisture from leaks or excessive humidity can seep into the walls, providing the necessary conditions for mold growth. To check for mold in these hidden areas, carefully inspect any peeling or bubbling wallpaper, as well as discolored patches. If you suspect mold, it is crucial to address the source of moisture and remove the affected wallpaper or wall coverings to prevent further mold growth.
Crawl Spaces and Attics
Crawl spaces and attics are often overlooked areas, making them ideal environments for mold to flourish. Poor ventilation, coupled with high humidity levels, can create a perfect breeding ground for mold growth. It is essential to periodically inspect these spaces for any signs of mold, including musty odors, discoloration on the surfaces, or dampness. Regularly checking and maintaining proper ventilation, insulation, and moisture control in crawl spaces and attics can help prevent mold growth.
Inside HVAC Systems
Heating, ventilation, and air conditioning (HVAC) systems can become hidden reservoirs for mold. Condensation and moisture can accumulate within the system, providing a conducive environment for mold growth. Mold-infested HVAC systems can spread mold spores throughout the home, leading to widespread contamination. To prevent mold in HVAC systems, ensure regular maintenance, clean or replace filters as recommended, and inspect and address any leaks or moisture issues promptly. A well-maintained HVAC system will not only improve indoor air quality but also minimize the risk of mold growth.
Beneath Carpets and Padding
Mold can also take hold beneath carpets and padding, especially in areas exposed to moisture, such as near windows, doors, or in basements. Condensation or water intrusion can seep into the carpet and padding, providing an ideal environment for mold to grow unnoticed. Regularly inspect your carpets for any signs of mold growth, including discoloration, a musty odor, or dampness. If you find mold, remove and properly dispose of the affected carpet and padding, addressing the underlying cause of moisture to prevent future mold growth.
Being aware of these hidden places where mold can be found allows you to take preventive measures and maintain a mold-free home environment. By regularly inspecting behind wallpaper, in crawl spaces and attics, inside HVAC systems, and beneath carpets, you can detect and address mold growth before it becomes a widespread and costly problem. Taking proactive steps towards mold prevention will contribute to a healthier living environment for you and your family.
Smart Home Technology to Monitor and Prevent Water Damage
10/17/2023 (Permalink)
 Consider installing smart home technology into your home to protect against water damage.
Water damage is a common and costly issue that homeowners often face. Whether it's a burst pipe, a leaky faucet, or a flooded basement, water damage can lead to significant property damage and expensive repairs. However, with the advancements in smart home technology, homeowners now have the opportunity to proactively monitor and prevent water damage. In this blog post, we will explore how smart home technology can help in monitoring and preventing water damage in your home.
Smart Water Leak Detectors
Smart water leak detectors are devices that can detect the presence of water in areas prone to leaks, such as bathrooms, kitchens, and basements. These detectors can send real-time alerts to your smartphone when a leak is detected, allowing you to take immediate action before the damage escalates.
Smart home technology can also provide real-time monitoring of water flow in your home. By installing smart water flow monitoring devices, you can keep track of water usage and identify any abnormalities. Sudden spikes in water flow can indicate leaks or burst pipes, triggering an alert to help you address the issue promptly.
Automatic Shut-Off Valves
In the event of a water leak or excessive water flow, automatic shut-off valves can automatically turn off the main water supply to your home. These valves can be connected to smart home systems and triggered by the detection of water leaks, minimizing the extent of potential damage.
With smart home technology, you can remotely control your water valves using smartphone apps or voice-activated assistants. This allows you to shut off the water supply when you're away from home, offering peace of mind and preventing water damage in case of emergencies.
Moisture and Humidity Sensors
Smart moisture and humidity sensors can help detect potential water damage caused by excessive moisture or high humidity levels. These sensors can send notifications when moisture levels exceed a predetermined threshold, allowing you to take necessary actions to prevent mold growth and other water-related issues.
Integration with Home Security Systems
Smart home technology can integrate with home security systems, providing a comprehensive approach to monitoring and preventing water damage. When suspicious water-related activities are detected, such as sudden changes in water flow or leaks, the security system can trigger alarms and send alerts to your smartphone and security monitoring service.
Real-Time Alerts and Notifications
One of the significant advantages of smart home technology is receiving real-time alerts and notifications directly on your smartphone. Whether it's a water leak, a burst pipe, or excessive moisture, immediate notifications enable you to respond quickly and minimize potential water damage.
Smart home technology not only provides real-time information but also allows you to access historical data and insights. By analyzing water usage patterns and historical data, you can identify potential issues and make informed decisions to prevent water damage in the future.
Professional Monitoring Services
Some smart home technology providers offer professional monitoring services for your water detection and prevention systems. These services can provide an additional layer of protection, with experts monitoring your home 24/7 for any water-related issues and taking necessary actions to limit damage. Consider incorporating smart home technology into your home to safeguard against water damage and enjoy the convenience of a smarter, more secure living space.
Coping with Power Outages during a Storm
9/23/2023 (Permalink)
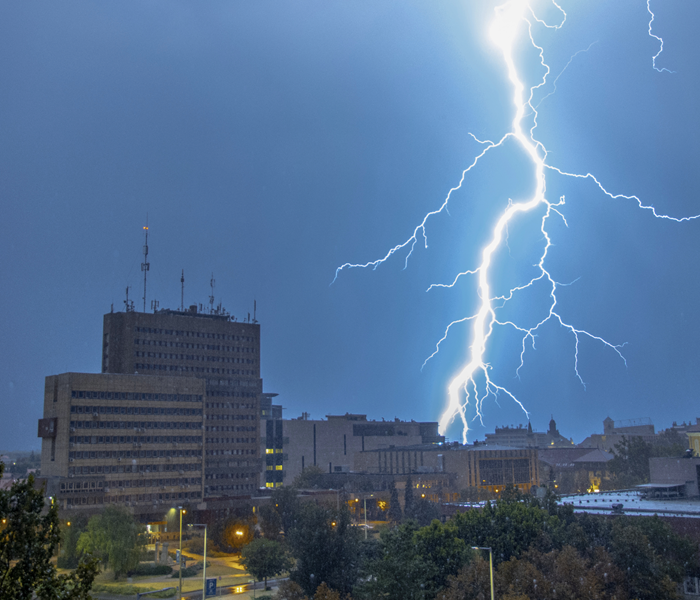 When storms leave you with power outages, ensure you have strategies to stay safe.
Power outages are a common occurrence during storms, and they can disrupt our daily lives and pose various challenges. Being prepared and knowing how to cope with power outages is essential for staying safe, comfortable, and connected during these challenging times. In this blog post, we will explore some practical tips and strategies for coping with power outages during storms.
Create an Emergency Kit
Having an emergency kit prepared in advance is crucial for dealing with power outages. Include essential items such as flashlights, extra batteries, a battery-powered radio, a first aid kit, non-perishable food items, bottled water, a manual can opener, and a backup power source, such as a generator or a battery pack for charging essential devices.
Stay informed by keeping a list of important phone numbers, including the local power company, emergency services, and any local updates provided by authorities. Consider downloading relevant apps or subscribing to emergency alert services to receive real-time information about the outage and any safety measures.
Minimize Power Usage
During a power outage, conserve energy by minimizing power usage. Turn off all non-essential lights, appliances, and electronics to reduce the strain on the electrical system when power is restored. Unplug sensitive devices to protect them from power surges when the power comes back on.
Keep the refrigerator and freezer doors closed as much as possible to maintain the cold temperature and preserve perishable food. If the outage is prolonged, consider moving essential items to a cooler with ice. Additionally, ensure you have an adequate supply of any necessary medications and keep them in a cool, dry place.
Stay Safe
Stay safe during a power outage by using caution. Keep candles and open flames away from flammable materials and never leave them unattended. If using a generator, follow the manufacturer's instructions and place it outside to prevent carbon monoxide poisoning. Use flashlights instead of candles whenever possible to reduce the risk of fire.
During a power outage, it's important to stay hydrated and comfortable, especially if the outage occurs during extreme weather. Have bottled water stored and use battery-operated fans or open windows for ventilation. If necessary, seek alternative shelter with friends, family, or emergency shelters to ensure your safety and well-being.
Maintain Communication
During a power outage, it's crucial to maintain communication with loved ones and authorities. Keep your mobile devices charged and use them sparingly to conserve battery life. Consider investing in a portable phone charger or a car charger as an additional power source. If cell service is unavailable, use a landline phone if possible.
Reach out to neighbors, friends, or community organizations to offer or seek assistance during a power outage. Check on vulnerable individuals, such as the elderly or those with medical conditions, to ensure their well-being. Sharing resources, expertise, and support can make coping with a power outage more manageable and less stressful.
Remember to be patient during a power outage. Restoration efforts can take time, especially during severe storms or widespread outages. Trust that the utility companies are working diligently to restore power as quickly and safely as possible. Coping with power outages during storms can be challenging, but with preparation, practical strategies, and a calm approach, you can navigate through these situations. By following these tips, you can minimize the impact of power outages, ensure your safety, and make the experience more manageable for yourself and your loved ones.
How Many Fire Alarms Should I Have in My Home? Understanding Fire Safety Guidelines
9/12/2023 (Permalink)
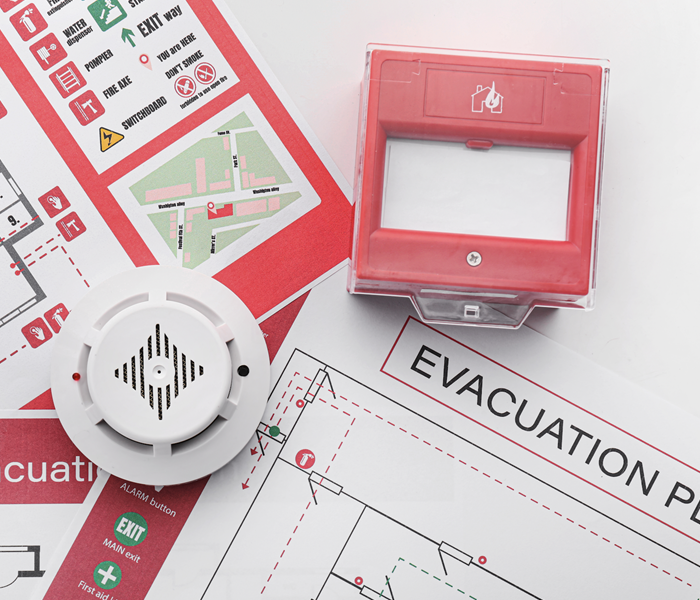 Having the right amount of fire alarms and evacuation plan incase of a fire or emergency.
Fire safety is critical for every homeowner, and one of the most crucial components of fire safety is smoke alarms. Smoke alarms are designed to detect the presence of smoke and alert you to the dangers of a fire. But how many smoke alarms do you need in your home to ensure maximum safety? In this blog post, we'll take a closer look at the fire safety guidelines and recommendations for smoke alarms.
Basic Guidelines for Smoke Alarms
The National Fire Protection Association (NFPA) recommends that every home have a smoke alarm installed in every bedroom, outside each sleeping area, and on every level of the home, including the basement. However, the specific number and placement of smoke alarms depends on the size and layout of your home.
When determining how many smoke alarms you need in your home, consider the following guidelines:
- Consider the Size and Layout of Your Home. The number of smoke alarms you need depends on the size and layout of your home. Larger homes or those with multiple levels may require more smoke alarms to ensure adequate coverage. When determining the placement of smoke alarms, consider the location of sleeping areas, stairwells, and other areas where fires are most likely to occur.
- Follow Local Fire Safety Codes. In addition to the NFPA recommendations, you should also follow the local fire safety codes for your area. Many states and municipalities have specific requirements for smoke alarms based on the size of the home and the number of occupants.
- Use Combination Smoke and Carbon Monoxide Alarms. Carbon monoxide is a deadly gas that can accumulate in your home without warning. Combination smoke and carbon monoxide alarms are recommended to ensure adequate detection and protection against both smoke and carbon monoxide.
Test smoke alarms regularly. Once installed, smoke alarms should be tested regularly to ensure they are functioning correctly. The NFPA recommends testing smoke alarms at least once a month and replacing batteries every six months. Smoke alarms should also be replaced every ten years.
Ensuring your home has an adequate number of smoke alarms is critical for fire safety. Generally, the NFPA recommends having a smoke alarm in every bedroom, outside each sleeping area, and on every level of the home. However, the specific placement and number of smoke alarms depend on the size and layout of your home and local fire safety codes. Remember to test your smoke alarms regularly and replace them every ten years to ensure maximum safety and protection against fire. Also having an evacuation plan in place can help redirect your family and protect them incase of a fire or emergency. Practice the evacuation plan periodically to ensure all the member of your household know where to meet incase of a fire.


 24/7 Emergency Service